
Using Cost Allocation Table
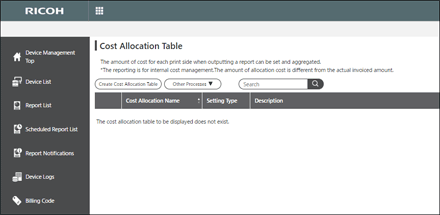
Cost Allocation Table allows you to create a rate used to allocate the amount of cost per side of paper when using the reporting function to output counter-based cost allocation results.
Cost Allocation Table has the following two options available:
Standard: Applies the same amount of cost regardless of paper size/color
Custom: Applies different amounts of cost to different paper sizes/colors

Cost allocation results are estimated amounts of cost, and they differ from amounts actually charged.
Enabling Cost Allocation Table
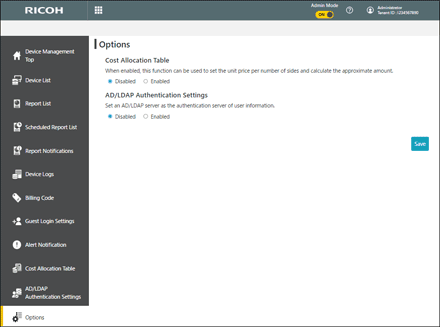
To use Cost Allocation Table, enable "Cost Allocation Table" in Options.
 Select "Enable" for "Cost Allocation Table", and then press [Save].
 Click [OK].
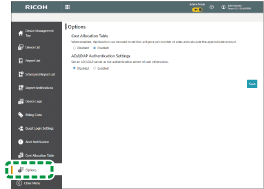
[Cost Allocation Table] is added to the menu.
Creating a New Cost Allocation Table
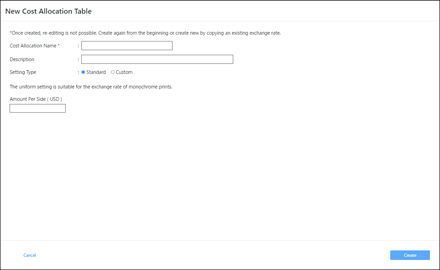
A cost allocation table, once created, cannot be modified. If you want to create a cost allocation table with part of an existing table used, use "Create New by Copying Cost Allocation Table". For more information about this, see Creating a New Cost Allocation Table by Copying an Existing Table.
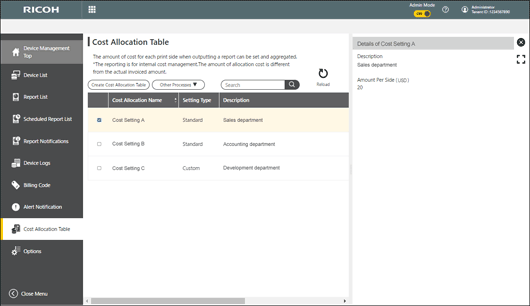
On the Cost Allocation Table screen, click [Create Cost Allocation Table].
On the "New Cost Allocation Table" screen that is displayed, fill in the Cost Allocation Table Name, Description, Setting Type, and Amount Per Side.
Setting | Descriptions |
|---|---|
Cost Allocation Name | Specify the name of the cost allocation table. (This is required.)
|
Description | Specify the description of the cost allocation table.
|
Setting Type | Choose between "Standard" and "Custom". |
Amount Per Side (USD) *1 | Specify the amount of cost for the cost allocation table. The integral part can contain up to six digits, and the decimal part can contain up to four digits. If the unit of the currency is "(JPY)", you cannot enter any digit in the decimal part.
|
*1 The unit of currency displayed is based on the country where the tenant resides.
 Click [Create].
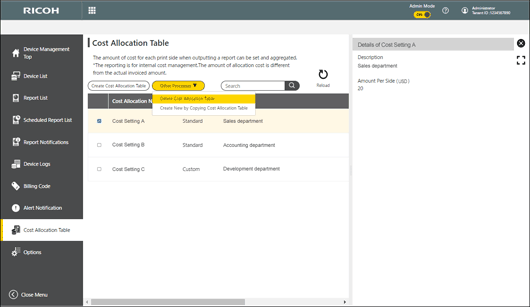
Creating a New Cost Allocation Table by Copying an Existing Table
On the "Cost Allocation Table" list screen, check the cost allocation table to copy.
Only one cost allocation table can be checked at a time.
From [Other Processes], Select [Create New by Copying Cost Allocation Table].
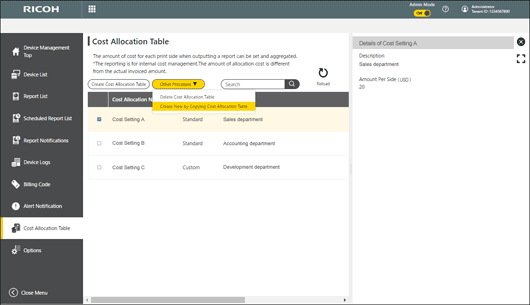
The "New Cost Allocation Table" screen appears with the contents of the copy source populated, and from there you can modify the contents as necessary.
 Click [Create].
Deleting a Cost Allocation Table
A cost allocation table in use by the scheduled reports or reporting function cannot be deleted.
On the "Cost Allocation Table" list screen, check the cost allocation table that you want to delete.
More than one cost allocation table can be checked.
From [Other Processes], select [Delete Cost Allocation Table].
Click [OK].