Unconfiguring Setup
This section describes how to unconfigure the setup of one or more devices.
The unconfiguration method to be used depends on the setup method used.

When unconfiguration setup is completed, the reporting function is unavailable.
If the Downloaded Cloud Settings Was Used for Setup
 On the home screen, press [Cloud Settings].
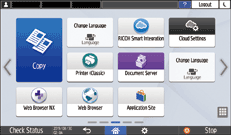
 Press [Unsetting].
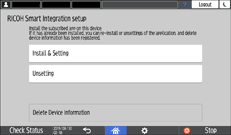
 Press [OK].
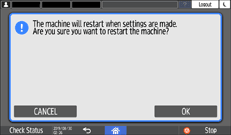
Uninstallation begins.
Follow the on-screen instructions to complete unconfiguration.
If the device is restarted during unconfiguration, wait for the device to complete restarting.
If a screen for entering machine administrator information is displayed, enter the login user name and password of the machine administrator, and press [OK].
If setup removal fails, an error message is displayed. To perform setup removal again, press [Retry].
 On the home screen, press [Application Site].
 Press [RSI Control+ Setup].
Depending on the country or region where this product is used, a different application name is used as follows:
Mainly in North America: [SI Device Enhancement]
Mainly in Europe: [RSI Control+ Setup]
Mainly in Asia: [RICOH Cumo-nect Office]
Mainly in South America: [Ricoh Smart Suite Easy Setup]
 Press [Uninstall].
 When the uninstallation of the various apps is complete, press [Close].
 Turn off the main power switch, and turn on it again manually.
If the Downloaded Cloud Settings Was Used for Setup (When the Installed Firmware Supports RICOH Always Current Technology Version 2.0 or later)
 On the home screen, press [Cloud Settings].

When the initial settings are complete but the [Cloud Settings] icon is not added to the Home screen, press [Settings] [Basic Settings When Intalling]
 [Installation Settings]
 [Cloud Settings].
 Select [Allocate/Deallocate Packages].
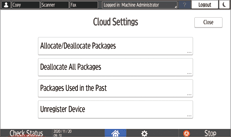
 Confirm the message on the screen, and then press [Continue].
 Remove the check from the package to be deallocated, and then press [Next].
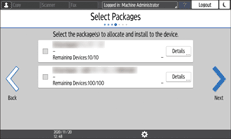
Press [Details] to confirm the details of the package.
 On the screen for scheduling package installation, specify the time at which to uninstall the package, and then click [Next].
To start uninstallation at the specified time after [Cloud Settings] is complete, remove the check from [Install immediately after the settings are complete].
 If the [Cloud Settings] icon is not added to the Home screen, specify whether to add the icon, and then press [OK].
 Press [Close].
When [Install immediately after the settings are complete] is checked in step 5, the packages for which the check is cleared on the [Select Packages] screen are uninstalled.
Deallocate All Packages
You can deallocate all packages from the machine and uninstall them at once.
Confirm the contents of the screen, and then press [Unregister].
When you press [Unregister], all packages will be uninstalled immediately.
If the Batch Device Registration for PC Tool Was Used for Setup
 On the home screen, press
  .
.
 Press [Cloud Settings].
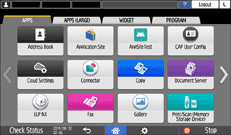
 Press [Unsetting].

 When the uninstallation of the various apps is complete, press [Close].
 Press [OK].

Uninstallation begins.
Follow the on-screen instructions to complete unconfiguration.
If the device is restarted during unconfiguration, wait for the device to complete restarting.
If a screen for entering machine administrator information is displayed, enter the login user name and password of the machine administrator, and press [OK].
If setup removal fails, an error message is displayed. To perform setup removal again, press [Retry].
When unconfiguration succeeds, the home screen appears.
