Using a Computer for the Batch Setup of Multiple Devices

The computer must be connected to the multiple devices over the network.
The computer must be able to access RICOH Smart Integration via the internet.
If firmware update or device restart occurs during setup, do not turn off any of the devices until the firmware update or device restart is complete.
If firmware update or device restart occurs during setup, wait until the firmware update or device restart is complete and make sure to do the following.
Do not turn off any of the devices.
Do not turn off the computer.
Keep the device registration tool running.
In some countries or regions, the device registration tool is not available.
Use a recent version of the device registration tool. If the file name of your device registration tool ends with "1.x.x" or earlier, download and use a version of the tool for which the file name ends with "2.x.x".
 Download the device registration tool and save it to any location (where the user has editing permission) on your computer.
 Unzip the downloaded zip file, then double-click "DeviceRegistrationTool".
The device registration tool is started up.
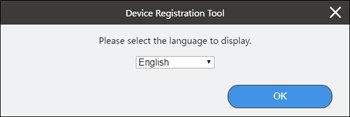
 Select a language, then click [OK].
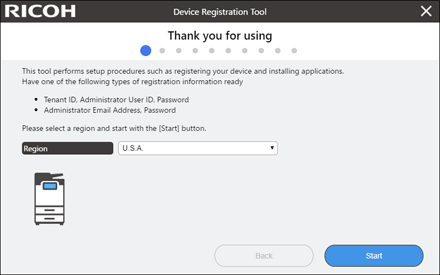
 Select your region, then click [start].
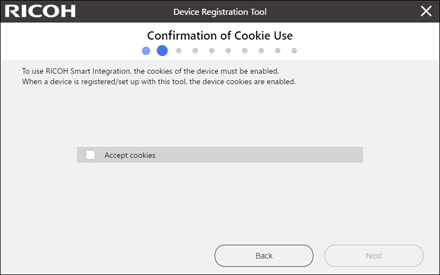
 Check “Accept cookies”, and then click [Next].
 Click [Confirm Connection].
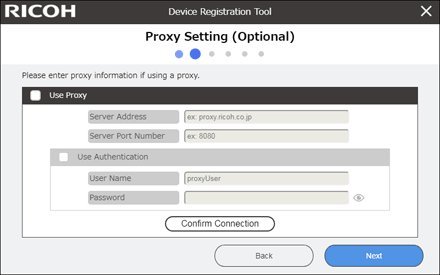
For using a proxy, select the "Use Proxy" checkbox.
Check that the internet can be connected to.
 Click [OK], then click [Next].
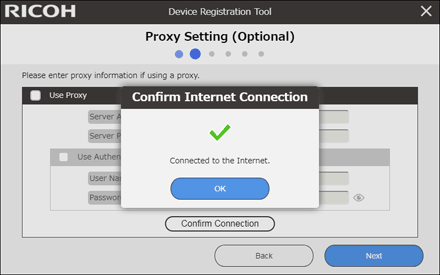
If a message indicating an incorrect proxy setting is displayed, click [OK], then click [previous]. Check the proxy settings, then repeat from Step 6.
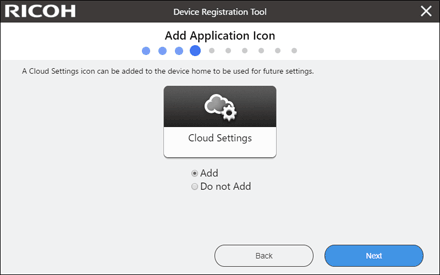
 Select whether to add a "Cloud Settings" icon to the home screen of the machine, and then click [Next].
 Specify the time at which to update the application, and then click [Next].
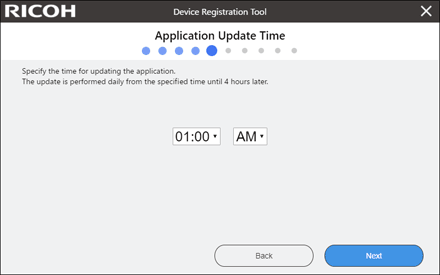
The auto-update time can be specified in one-hour increments between 00:00 AM and 11:00 PM. The initial value is set to "01:00 AM".
The specified time is in the time zone of the machine.
An attempt to update the application is made within four hours of the specified time every day.
 Click [Login].
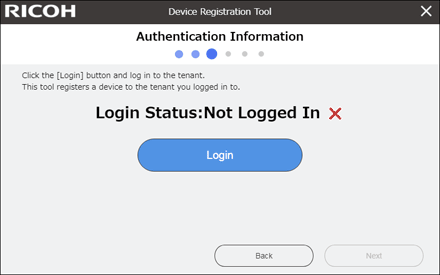
 Log into RICOH Smart Integration.
Use the appropriate login method preconfigured for RICOH Smart Integration.
 Enter the IP addresses of all the devices that you want to set up.
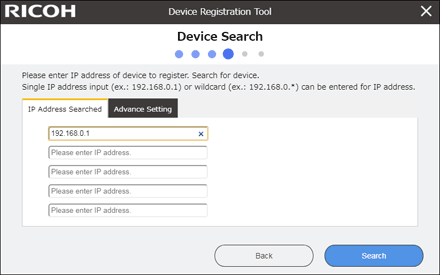
To add an additional IP address entry field, click [Add another target IP.].
Up to five IP addresses can be set. Wildcards can be used in IP addresses.
Click [Advanced settings] to use machine administrator accounts or SNMP access accounts as search conditions.
 Click [start searching].
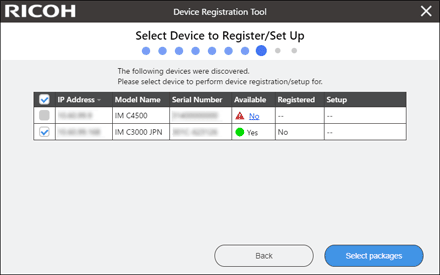
The device registration tool searches for the entered IP addresses and displays found devices.
 Check the device that you want to set up, and then click [Select packages].
 For each device, select the checkbox for each package that you want to install, and then click [Register/Set Up].
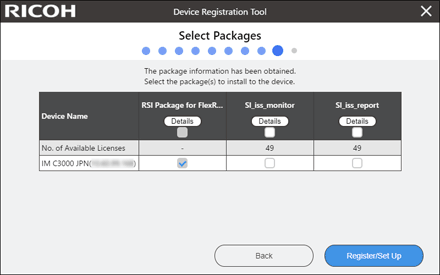
You can view more-detailed information about each package by clicking [Details] within the package name column. The detailed information includes the following:
Information displayed | Description |
|---|---|
Package name | Name of the package |
Plan name | Name of the pricing plan for the package |
Available licenses | Number of licenses available for the package |
Full licenses | Number of all licenses held by this tenant |
Contract ID | Contract ID for the package |
Expired on: | Expiration of the package Example: If the package expires on December 31, 23:59:59, 2021, this is shown as "2021/12/31 23:59:59". |
A package that meets any of the following conditions cannot be selected:
Has a license assigned to it
Is associated with a user license
Number of licenses available is "zero"
 Check that "Complete" is displayed under " Register/Set Up Progress" for each of the devices, then click [Finish].
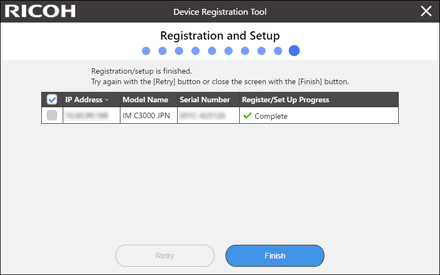
"Complete" is also displayed under the "Register/Set Up Progress" column if a device that is already registered is set up.
If the setup fails, error information is displayed in the " Register/Set Up Progress" column. Click the error information to display error details. Check the error details and solve the error.
To perform setup again, select the checkbox, then click [Retry].
